▫️Publishing Overlays
Yay! You made your overlay and now it's time to publish it!
Publishing
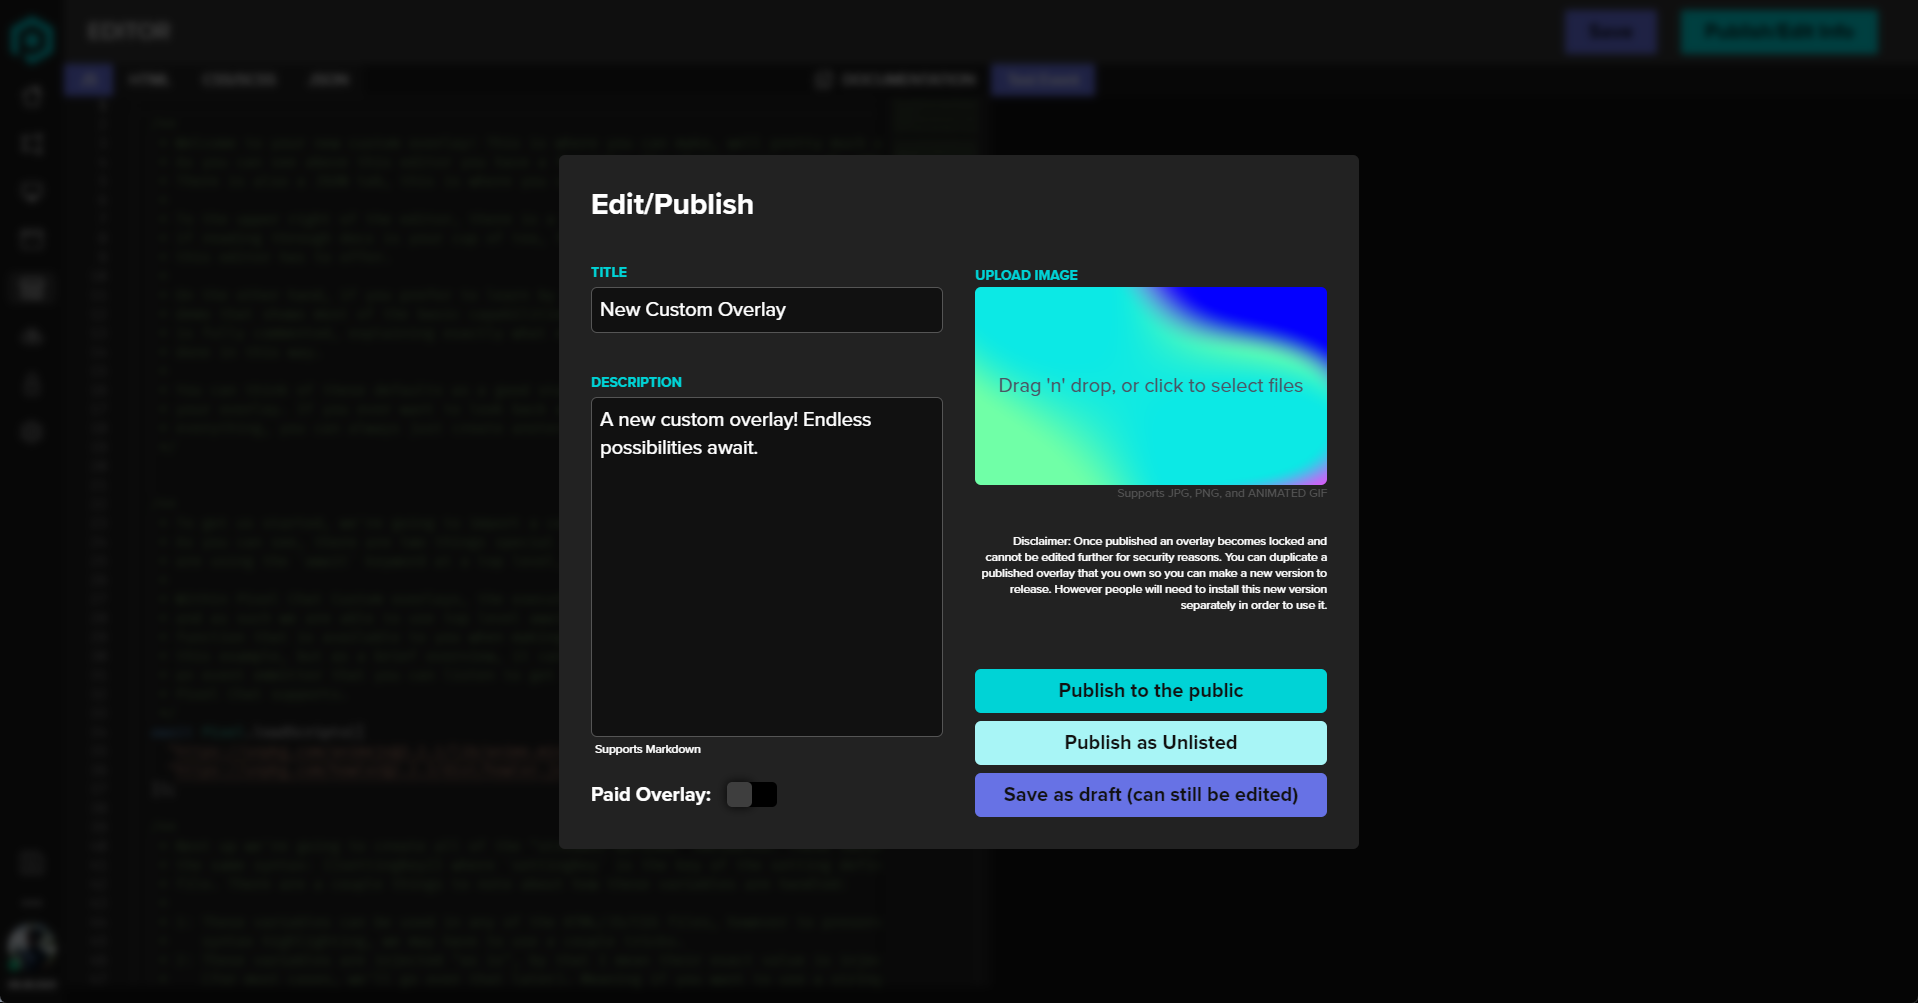
To publish an overlay, open up the editor and click the Publish button in the upper right, that will open up a modal that looks like this:

This is where you are able to set all the information about your overlay that will be shown on its Plaza page! To start, give your overlay a good title, this is likely what people will be searching for, so be sure to make it note-worthy!
Next up is the description, the description for plaza pages fully supports markdown, as such you are able to include links, images, and all sorts of formatting. At the time of writing this, the input is a simple text box, so we recommend using an external markdown tool to write your descriptions, then paste in the completed content.
Lastly is your cover image, this is the image that will be shown on the discover page, on the overlays Plaza page, and the cover image for the link embeds on platforms like Twitter or Discord.
Once you're done with those it's time to actually publish the overlay, you have a couple of options. You may either publish it to the Public Plaza, or publish it as "Unlisted"
You may also notice the "Paid Overlay" toggle, we will go over that at the end of this page.
Public
Option 1 is to publish the overlay publically, this means it will show up on the discovery tab, and on searches. It will also be indexed by search engines. Simply put, if you want your overlay to be seen and used by as many people as possible, this is likely the option you want to go with.
Unlisted
The second option is to publish your overlay as Unlisted. Doing this will prevent your overlay from being found on the discover page, and will also make it not show up in searches. However you will still get a "Plaza Page" link, that you can send to anyone. This Plaza Page link is "open" in the sense that anyone that has the link is able to view and add the overlay to their account. In the future there will be a system to generate "1 time use" links, however this has yet to be completed.
Paid Overlays.
Now it's time to talk about paid overlays. By default when you publish an overlay to the Plaza, it is marked as free. This means anyone who finds it can add the overlay to their account for free, and can use it. However, during the publishing process, you can opt to post your overlay to the Plaza as a paid overlay. If you do opt to do this, the price of the overlay is completely up to you.
Please note that in order to publish a paid overlay, you must first set up a Seller Account on Pixel Chat, you can learn how to do that here:
Alright, you've set up your seller account, and you've marked your new overlay as a $5 paid overlay. Now what?
Fees
Pixel Chat charges a small platform fee for each sale of a custom overlay, by default this fee is 10%. We use this fee to cover the payment processing fees, as well as site hosting fees.
This means if you sell an overlay for $10, Pixel Chat would charge a $1 platform fee, and your payout for that sale would be $9.
Verified Plaza creators all have their fees lowered to 3%, you can read more about getting your account verified here:
✅VerificationLast updated